Here are the pics referred to in post 15. Sorry for the delay.
Richard


Here are the pics referred to in post 15. Sorry for the delay.
Richard
deteriorated foam 'goo' is not indicative of "scratchy" sound, but rather frozen/stiff cone movement which is silent. I would suggest there's an issue with geometry somehow. just sayin.
Earl's post # 12 raises an interesting question here.
RE "To the best of my knowledge all JBL woofers with ceramic magnets, having a single back vent, sport this internal foam filter. If one looks through the back vent ( looking past the foilcal screen if present ) and doesn't see the internal filter, one should still assume bits of it are present ( until proven otherwise )."
I took JBL's word as God's word so to speak regarding their own products on screen vs foam on/in back vent. But nevertheless suggested to OP in post # 11 to check under the screen to see if there's foam, just in case. The potential problem with "until proven otherwise" is that one MAY be cutting the dustcap legitimately (foam present) or not (no foam)?
Earl's post also raises a concern for me with the 2205H having ceramic magnet. Not a blame nor his fault. I knew for the 2214H and corrected the foam issue. Simply wish the matter of screen/foam would be one OR the other as mentioned by JBL in the pic below, instead of one AND/OR the other Earl appears to refer to. The 2205H do have a foil cal and a screen, peace of mind I thought, up to this point with the above mention which may imply they could also have foam cancer. Better learning it "late" than never, however I don't have time these days to check "on site". Later will try. Regards,
Richard
P.S. The pic below is JBL data shown on a JBL related Web site here, so I assume copyright issues (if any, none indicated) aren't applicable in this context.

Richard,
Nice pic!
I'd need to check but I think the ( noted ) screen was dedicated to JBL's M.I. drivers ( after around 1980 and the intro of ferrite magnets ).
Previous to that time period all the alnico type drivers ( Home, Pro + M.I. ) used a plastic-like mesh screen over the internal vent ( "blow-hole" ).
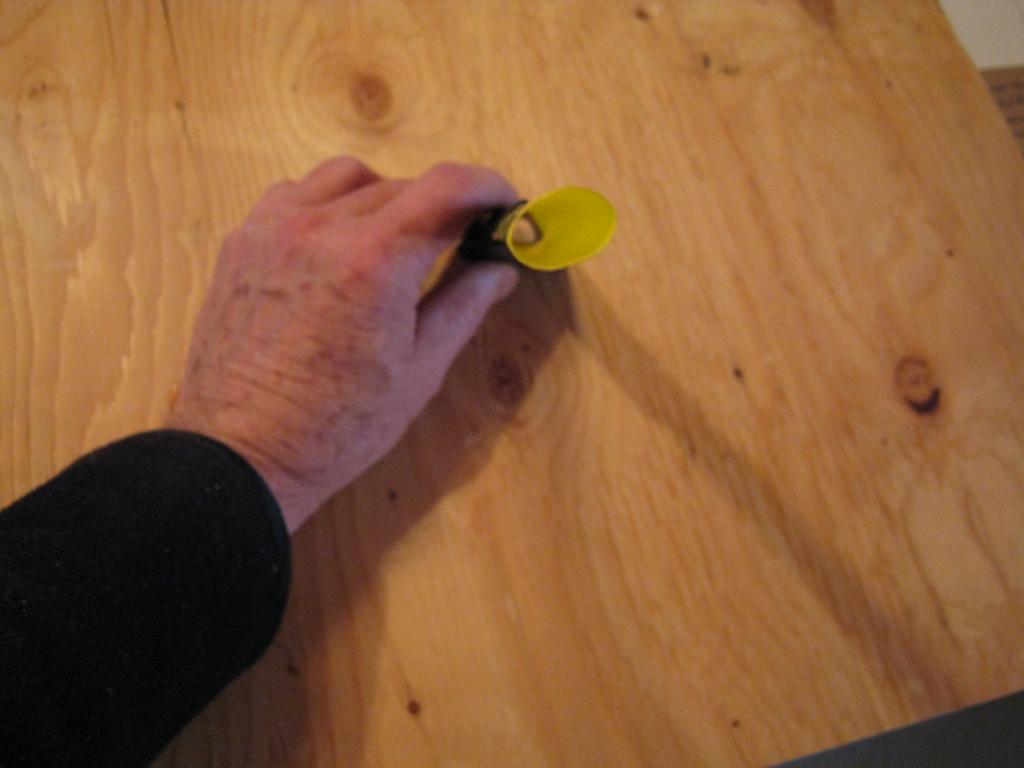
PS; Here's a shot of my adhoc vacuum attachment used for foam bit removal inside the dust-cap area ( one can see that suction can be adjusted by a fingering the open area where the two portion of attachments meet.
From this thread over at AK
Hi Earl,
Thanks for the input.
I don't dispute your previous statement that ferrite magnet drivers may also have foam inside in addition to screen, since I don't really know, never opened the rear nor dustcap, all original. The point is simply it pisses me off that I might have to do another tedious foam rot removal job... Maybe I felt overly safe, secured or comfortable about it in view of JBL pic I posted here. Could be that cruel reality may catch-up with me.
RE "I'd need to check but I think the ( noted ) screen was dedicated to JBL's M.I. drivers ( after around 1980 and the intro of ferrite magnets )."
I'm a bit confused now with that statement since my 2205H are not M.I. driver but from sound reinforcement 2200 series and I purchased them new Aug 6, 1980 just checked invoice (been with me 6 years longer than wife! LOL). So mine not MI, have ferrite and 1980 but have a screen.
Your adhoc vacuum attachment is pretty clever. Another proof that necessity is the mother of all inventions.
If you want to try the large straw attachement extention to suck up foam rot let me know, I can send you a free long blue or black straw, as you wish, in the mail, they're easy to cut to proper length, modify the end of it or even make two of them. I kept various plastic ones (see pics).
Probably would be shorter than what you use now. Just tape straw in corner of original vacuum attachment, like your computer attachment, and you keep the fingering adjustment for suction force. Plastic straws are out, not eco friendly, people throw them left and right polluting, getting banned everywhere now.
Regards,
Richard

This looked like a good place for my question/comments.
I recently completed the re-surround of my original-owner L112s and they are playing nicely, sitting atop the 240ti I recently did the same work. Next I tackled a pair of L150A that I bought with Don Mascali's help around the time I first joined this group. They needed surrounds then, and had a crushed tweeter. Garage storage wasn't kind to them over the past 18-years, but I've started the process using spare 044s purchased over the years and a fresh set of surrounds from Rick Cobb.
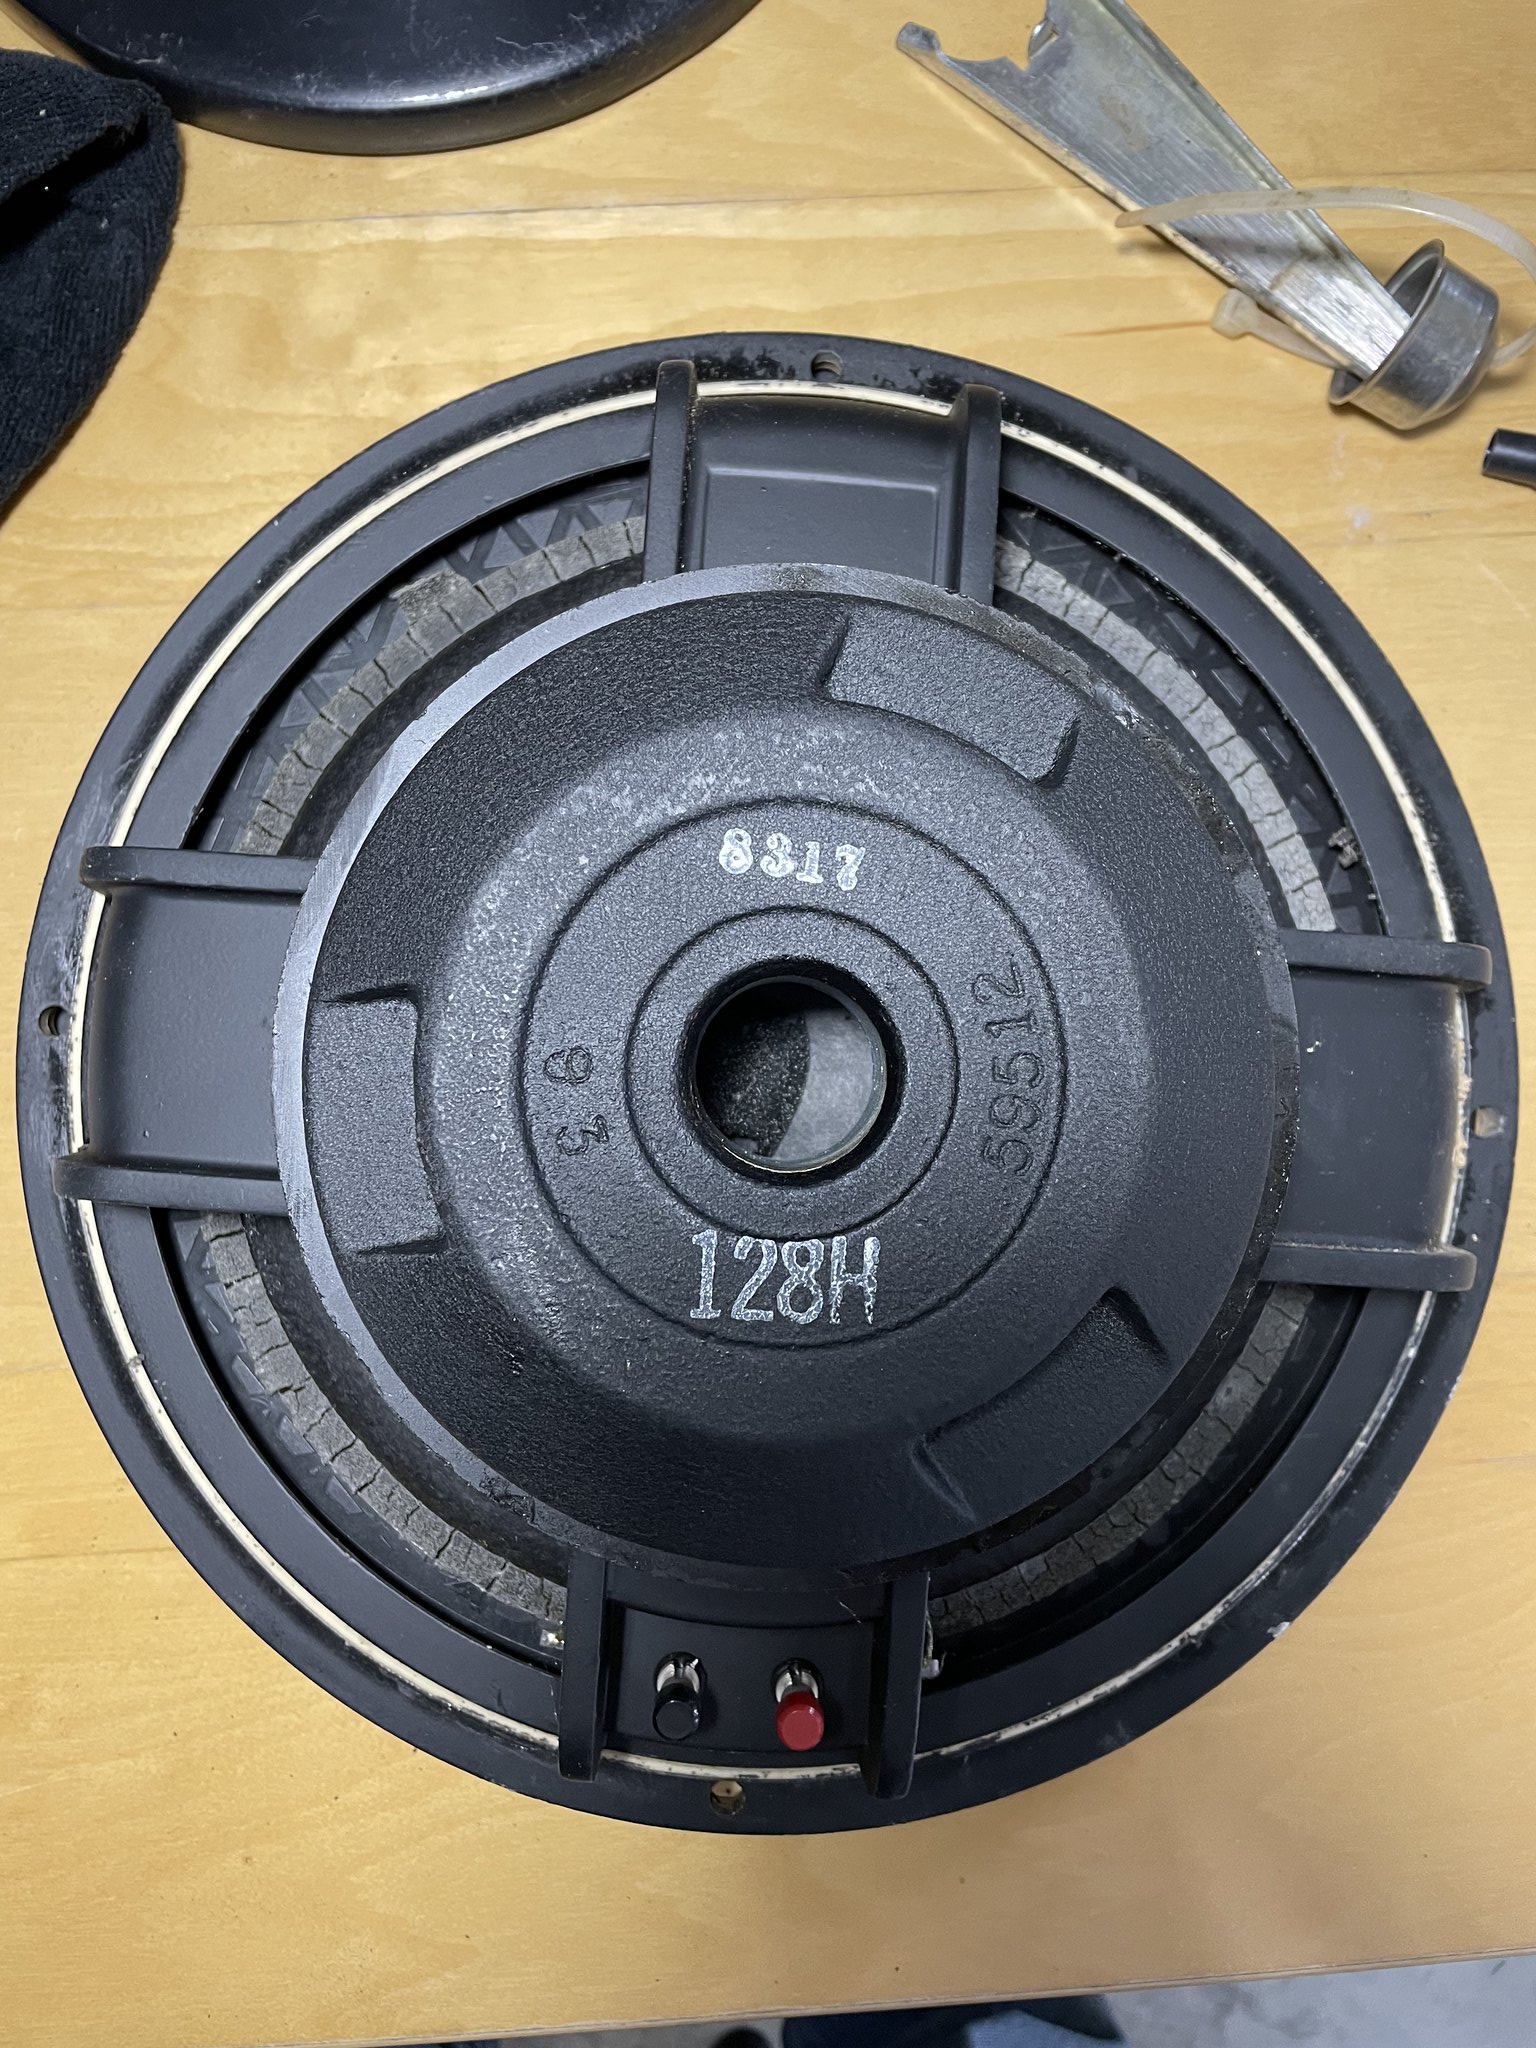
Now the 128H in the L112 had foilcals and rear screens over the vent. I checked before starting the surround repair and could not find any foam or residue in the vent hole. The ones in the 150A were lacking the foilcal, screen, and the protective "rubber tire" on the ones in the L112. The 150A's were simply stamped with white paint "128H" on the magnet assembly. But there was a pretty intact foam plug laying in the bottom of the vent on the inside of the dust cap. I sucked it up with my shop vac attachments but it didn't seem to have enough dimension to it to have been more than just loosely fitted in the hole. It wasn't sticky or deteriorated in any way, either. So, any suggestion to what I should replace the foam filter with? I have filter media I bought in a sheet to use for my Crown Studio Reference-II vent that I suppose I could cut to a tension-fit and just lay it in the hole. Or should it go over the hole so it won't fall in like the original? Or, in the sealed L150A does it really need a plug at all?

". . . as you have no doubt noticed, no one told the 4345 that it can't work correctly so it does anyway."Greg Timbers
I've also done away with clothes pins for glue drying, and now use a variety of different size pans and plates depending on what part of the process I need to support the speaker. In this picture one pan is under the face-down PR300 while a saucer is used on top to prevent pressure on the cone weights while the 128H is being used for additional weight. This all works well until my wife realizes I've purloined some of her prized antique bakeware. First passive-radiator I've done and somehow it feels like I'm cheating.
Oh yeah, and the turntable I bought just for this process is on the bottom of this stack.

". . . as you have no doubt noticed, no one told the 4345 that it can't work correctly so it does anyway."Greg Timbers
Hi Phil,
I would simply gaffer tape inplace some appropriate stiff plastic mesh ( or something else of your own choosing ) onto the outside of the magnet.
If you desire, you could add some porous 30ppi fish-tank foam onto ( or squashed underneath ) the outside of that stiff mesh.
Whatever, I would keep it everything on top of the magnet-vent.
That way it's always accessible for repair//replacing//modification, etc. etc. .
PS; I see that all my internally linked pics have now disappeared in the ongoing depredation of this forums assets.
Another interesting difference between the 128h in the L112 and those in the L150A (beyond a completely different texture of the white Aquaplas) is that the gasket which goes over the surround is different. The L112 has that gasket in four pieces separated by a straight cut joint midway in the quarter-section between the mounting holes. Those from the L150A (both 128H and PR300) is split into four pieces but AT the mounting-bolt holes.
I have no way of determining the age of any of these beyond knowing I purchased the L112s in 1982 and we know the L150A came out after the L112 and first hit the JBL catalog in 1981.
". . . as you have no doubt noticed, no one told the 4345 that it can't work correctly so it does anyway."Greg Timbers
As an example this is plastic mesh, actually just under one mm openings. The picture shows increased size.
Large enough to let air in and out the back vent, but small enough to keep the unwanted out.
Another option may be to use speaker grille fabric but as long as the knitting is not too tight...
POWERED BY: QSC, Ashly, Tascam, Rolls Mosfet, NAD, and Crest Audio
I just went with the same ATV filter medium I bought to cut out to fit the Crown Studio Reference front panel. X-Acto knife using a pill bottle as a guide, and four drops of glue to hold it in place. Should last my lifetime.
All the drivers for one side of the L150A are now done.

". . . as you have no doubt noticed, no one told the 4345 that it can't work correctly so it does anyway."Greg Timbers
I see the L150-A listed in the '82 home catalog (https://www.lansingheritage.org/html.../1982-home.htm) along with the B-460 but not the B-380. I would have guessed I bought my L150-A and B-380 in '82 but it was probably '83. My 128h woofers didn't have the foilcal, just the white stamp as you've shown.

I didn't know you had L150A's. Any pics of those things when they were new or close to it? The 128H's in my old 150A's had the foilcal.
Nice job on the 128H's, Phil! Angela and I just refoamed the 2215's in our 813C's. It was her idea, I'd have farmed them out. Glad I didn't though, wasn't that bad of a job. I did not stick anything over the vent though. If and when they come out, I'll be sure to do that.
I bought them in their current condition, smashed tweeter and four rotten surrounds. It's just taken me over 15-years to get around to them and their storage conditions didn't help. Now that I have time and proper storage, I felt it was time to start the project. I just pulled the grilles out of their bags and, luckily, they are in NIB condition.Originally Posted by DerekTheGreat

The L112s I've owned since they were new. They didn't need anything more than cleaning and surrounds. Even the tweeter foam plugs were in great shape. And I just got some Aleene's heat-activated fabric glue to tack the grille cloth back in place.
The full basement in the new house stays a constant 57º and 60% humidity. Perfect for storage of speakers, motorcycles, and even small cars.
". . . as you have no doubt noticed, no one told the 4345 that it can't work correctly so it does anyway."Greg Timbers
There are currently 1 users browsing this thread. (0 members and 1 guests)
 Posting Permissions

 Reply With Quote

