Page 1 of 2 12 LastLast
Results 1 to 15 of 25

Thread: B380 restoration

  1. #1
    Senior Member Mike F's Avatar
    Join Date
    Feb 2011
    Location
    Montreal, Canada
    Posts
    279

    B380 restoration

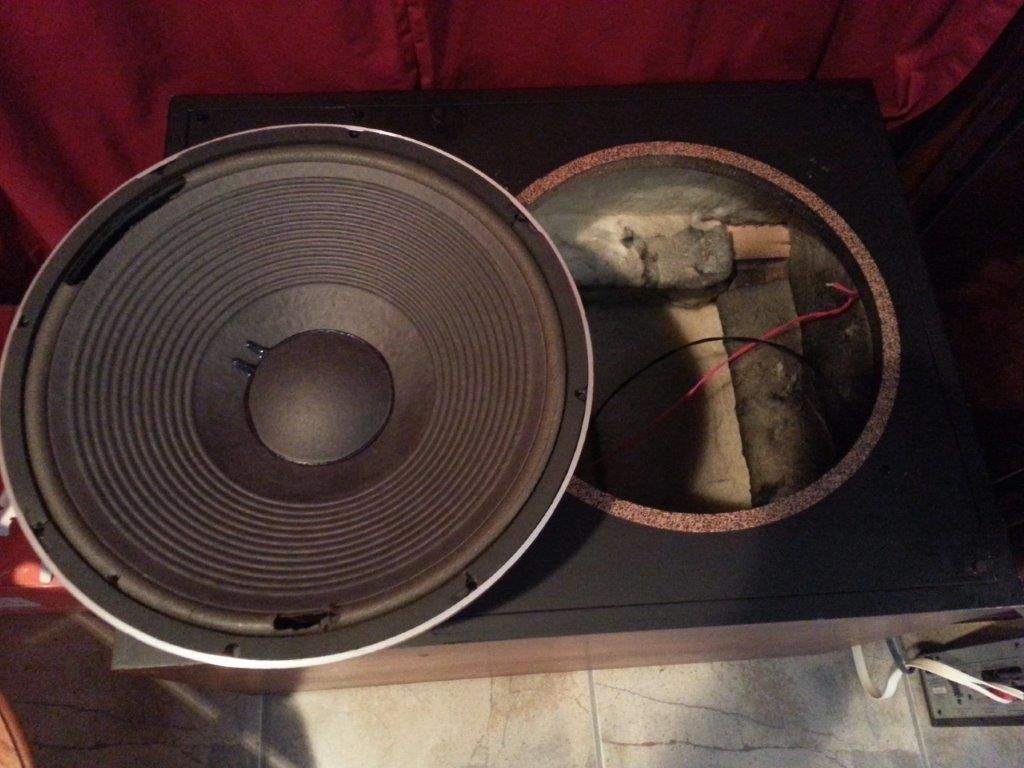
    I rescued a badly beaten, used and abused orphaned B380 cabinet today. No driver,processor, grilles or mounting hardware were included. As nasty as it is, the structural integrity has not been compromised so I deemed it fit for a Resurrection.
    It`s going to take some work to get it to become presentable again but I think it`ll be worth it

    What I really need to know at this point are the dimensions of the grilles and what the port/woofer cut-outs look like. Also, one grille peg is sheared off flush with the baffle. Are these just press fitted in?
    Any information would be most welcome.Name:  8.jpg
Views: 854
Size:  72.3 KBName:  11.jpg
Views: 957
Size:  78.2 KB

  2. #2
    Senior Member Tweak48's Avatar
    Join Date
    May 2003
    Location
    Pacific Northwest
    Posts
    157
    Hi Mike-

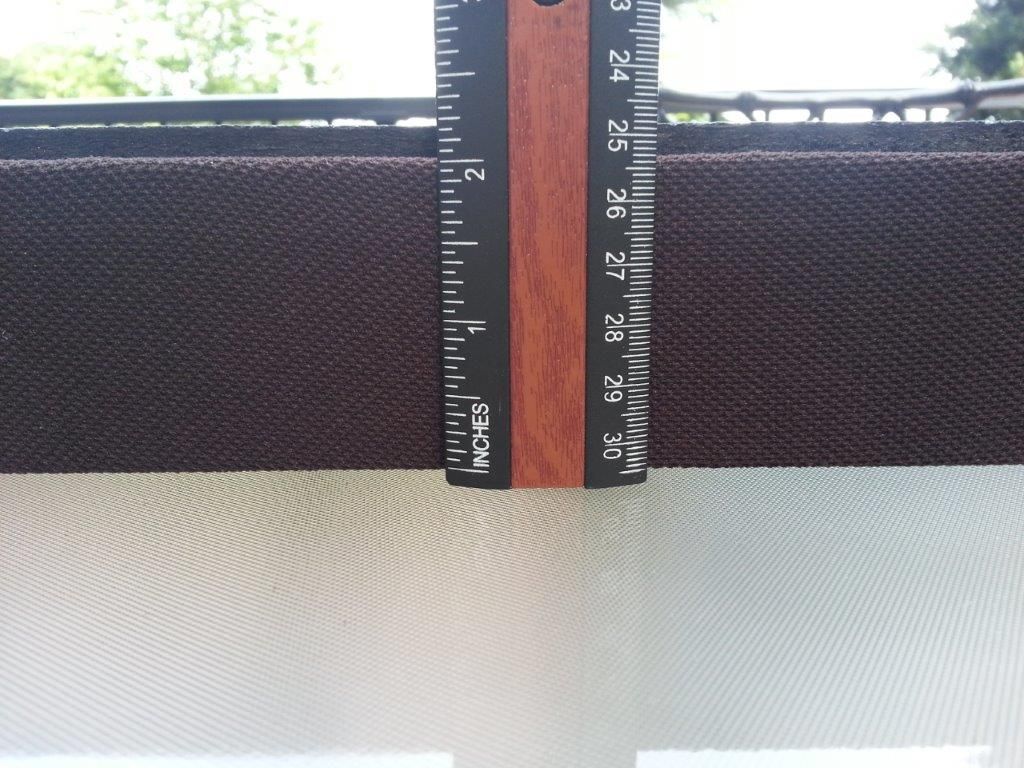
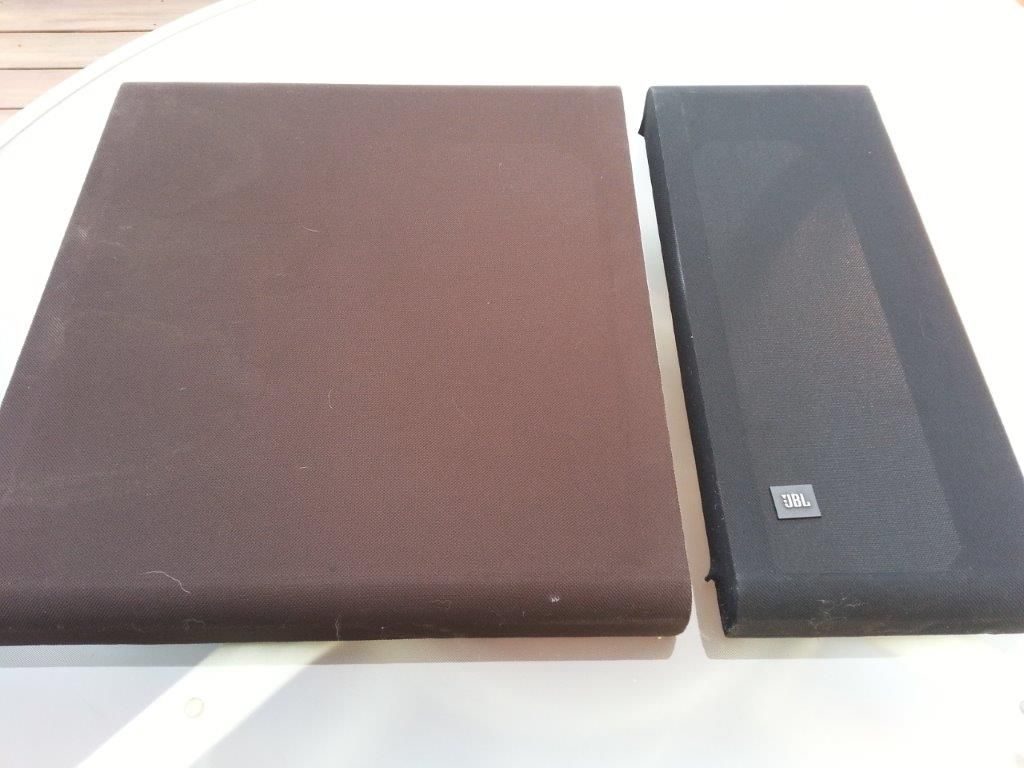
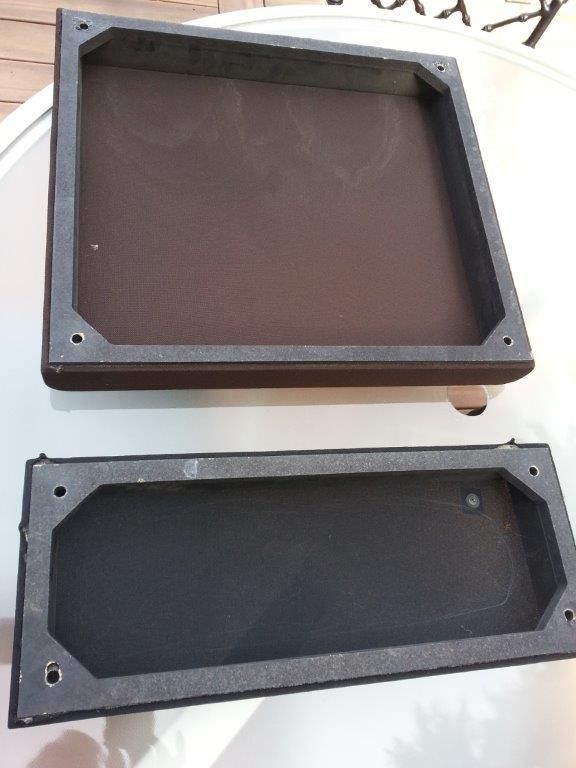
    Approximate measurements are as follows (no metric measuring tape unfortunately): 18.75" x 20.75"; 8.25" x 20.75" Depth as shown in photo. Grille frames are two piece particle board construction with corner bracing. You'll probably need a router for the bull nose edges. As you can see, I have problems of my own to deal with, but I appear to be in better cosmetic condition. I use mine for a HT sub. My AVR determines the crossover point and don't need the outboard crossover. So all I needed was a mono power amp. As for the peg, I'd just drill the old one out, and glue a new on in.

    Good luck and let me know if you need additional data. BTW, if you're not interested in doing an accurate cosmetic restoration, Parts Express has a decent generic replacement grille kit.

    Bryan


  3. #3
    Senior Member Mike F's Avatar
    Join Date
    Feb 2011
    Location
    Montreal, Canada
    Posts
    279
    Thank you so much for that, Tweak, it`s the first time I actually see the grille frames. It appears that each are composed of 2 frames, would that be an approximately 1" frame perimeter?

    I was doing some peg spacing measurements on the baffle and the port side, inner pegs are off by a significant amount (close to 1cm) with respect to the outer pegs.
    That would account for the broken peg as the port side grille could only go on in one position.
    Name:  1.jpg
Views: 695
Size:  62.8 KB

  4. #4
    Senior Member
    Join Date
    Apr 2016
    Location
    U.S.A.
    Posts
    302
    The grille peg is a simple friction or press fit

    JBL did not glue them in

    Readily available on-line or can be salvaged from another old cab of the period - DO NOT glue them in, you, or someone, may just need to remove them again some day, gluing ups the chances of baffle chipping and damage after all your work to make things look nice and doesn't do a thing to make them stay in place any better

    Glue doesn't adhere to that nylon like material anyway

  5. #5
    Senior Member
    Join Date
    Aug 2003
    Location
    La Habra, California USA
    Posts
    1,546
    There are some instances where JBL made the peg locations slightly asymmetrical to make sure the grille only goes on one way, either for fit or correct orientation.

    Regarding the pegs, if you don't glue them in, then be sure to undersize the hole a little for a very tight fit. Original pegs were cylindrical and in many cases were glued in, that's why they don't come out easily and many times break after becoming brittle. Some of the pegs that JBL sells/sold more recently have a multilayered feather type insertion section that goes in easier and resists pullout, but I'm not sure they hold that well in the long run without adhesive. Contact cement may work well as might yellow carpenter glue.

    There are new Delrin plastic peg versions available from seller sign-shop on ebay, pricey at $3 or 4 per, but very sturdy. I've used them in the past and they work well. I know of no other fully original looking replacement other than the fluted ones JBL now sells as replacements.

    If you have pegs that have fully broken off or are stubbornly resisting removal, use a screw or stud extractor device like the Alden Grabit or Grabit Pro, that makes the removal process painless, and doesn't disturb the original hole, even if the peg was glued in. I prefer the Alden US made product because IME, they are made better and are more durable than the cheap Chinese knockoffs.

    When faced with another JBL find, Good mech986 says , JBL Fan mech986 says

  6. #6
    Senior Member
    Join Date
    Apr 2016
    Location
    U.S.A.
    Posts
    302
    Easy outs are over kill for this job and expensive
    Also requires fairly accurate drilling (well centered) which isn't always so easy depending on how the peg is broken

    No need to buy a 20 dollar tool to fix a problem when there's a .50 cent solution that works exactly the same and just as well if not better

    If it's broken off flush with the baffle make a dent in the broken peg with a center punch, ice pick or small nail, whatever you have on hand that will work, as close to center as you can get it, and drill a small pilot hole in the peg
    Screw a wood screw into the hole
    Grab the screw with a pair of pliers or vice grips and firmly pull the peg out while turning the screw clockwise
    Alternatively, you can screw in a short screw and use the tool discussed below to simply pry out the broken peg using the screw head to grab onto

    For unbroken pegs, or pegs broken off above the baffle's surface use a small pry bar or automobile door trim tool with a thin blade
    There is a ridge at the top of a good peg for the tool to grab, the same ridge that grabs onto the particle board grille frame

    If your peg is broken and the ridge is gone, make a couple of notches with a saw blade for the tool to grab
    Use a wood carpenter's shim or similar to protect your baffle from dents while prying out the pegs
    The pegs do not get brittle, they are made of nylon

    Do not use glue, JBL didn't, and I have removed and re-installed dozens
    It is a wedge fit, if your holes are wallowed out then dowel them and re-drill fresh holes the proper size

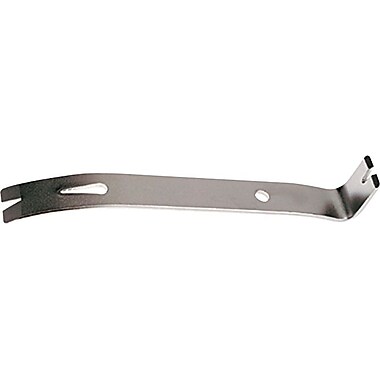
    This is a suitable tool, you can even find this one at Staples, will only cost you between 3 to 5 bucks
    Good tool to have in your box
    Stanley® Wonder Bar® II Pry Bar, Flat Shape, Tempered Steel, 7"


  7. #7
    Senior Member Mike F's Avatar
    Join Date
    Feb 2011
    Location
    Montreal, Canada
    Posts
    279
    Good tips Joseph Smith. I`m afraid I got a little ahead of myself with this restoration which, incidentally is moving right along very nicely so far. I refinished the baffle before extracting the broken peg . I now run the risk of marring the surface when I do get around to extracting it, but that wont happen before I source a replacement.
    The Ebay pegs sure look good but a single one will set me back more than $26 by the time it gets here so I`m trying to source a used one elsewhere if at all possible.

  8. #8
    Senior Member rdgrimes's Avatar
    Join Date
    Aug 2008
    Location
    New Mexico, USA
    Posts
    2,217
    The only limit to the number of uses for a Wonder Bar is your imagination.

    FWIW, things like pegs can also be extracted with a wood screw and a pair of pliers. Or construct a small "puller" with a couple small wood blocks and a cross-bar with a hole in it for the screw. As you screw in the screw it pulls the peg out.

  9. #9
    Senior Member
    Join Date
    Apr 2016
    Location
    U.S.A.
    Posts
    302
    Quote Originally Posted by Mike F View Post
    I now run the risk of marring the surface when I do get around to extracting it source a used one
    You won't mar the surface of your freshly finished baffle if you put one of these, or something similar, down between it and your pry tool whatever it is

  10. #10
    Senior Member
    Join Date
    Apr 2016
    Location
    U.S.A.
    Posts
    302
    Quote Originally Posted by Mike F View Post
    Good tips Joseph Smith. I`m afraid I got a little ahead of myself with this restoration which, incidentally is moving right along very nicely so far. I refinished the baffle before extracting the broken peg . I now run the risk of marring the surface when I do get around to extracting it, but that wont happen before I source a replacement.
    The Ebay pegs sure look good but a single one will set me back more than $26 by the time it gets here so I`m trying to source a used one elsewhere if at all possible.
    Look for and talk to folks with gutted cabinets up for sale
    I recently did a set of cabs and after I put the pegs back in I notice one of them was sitting too low. I thought what the hell is this? I mean I didn't re-installed them with a sledge hammer!
    Upon close close inspection I could see that JBL had actually repaired that hole at the factory, had re-drilled it and doweled it! With a loupe, I could see the faint line of the dowel. In the process, they had also made the hole a little deeper than all of the others. I used a shim and a pry tool, made the height adjustment and now all is well
    It will work fine, don't fret over it just relax, drill a pilot with a very small bit and pull it out
    Easier than pulling the cork out of a wine bottle

  11. #11
    Senior Member
    Join Date
    Apr 2016
    Location
    U.S.A.
    Posts
    302
    Quote Originally Posted by rdgrimes View Post
    Or construct a small "puller" with a couple small wood blocks and a cross-bar with a hole in it for the screw. As you screw in the screw it pulls the peg out.
    That's a good idea too but it can be a pain in the ass, overly complicated. The problem is the peg starts to turn in the hole before the screw can start the pull. You then would need to have your bar threaded to fit the screw so that the pulling force is applied regardless of if the peg starts to turn, this would require the use of a screw with a machine thread and that's not so good for what we're doing here, it's difficult to get a machine thread started into this material and then we're back to overkill with taps, extractors etc

    You'd also need to screw around and get the height just right for the homade puller, have a screw of the requisite lenth on hand, it's just making something very simple overly complicated.

    That same potential obstacle exists with my use of a wood screw and vise grips approach, that is why I say start with a small pilot hole and work your way up until you get a hole the wood screw can go into and grip well enough without turning and hold well enough to allow for pull out
    If you have reasonably strong fingers and hands you can pull those pegs out bare handed, that's what I always try first with unbroken pegs
    Either way, with a little careful thought and shade tree engineering it can be done quit easily with items lying around in most junk drawers and work benches
    Some small sharp drill bits, a wood screw and a pair of pliers

    Cannot emphasis enough how important it is to use SHARP drill bits for this sort of work

    It's just a 9mm OD nylon plug pressed into a 8.5mm ID hole, you don't have to jump through hoops or buy expensive tools to get them out

  12. #12
    Senior Member
    Join Date
    Apr 2016
    Location
    U.S.A.
    Posts
    302
    Quote Originally Posted by Mike F View Post
    Good tips Joseph Smith. I`m afraid I got a little ahead of myself with this restoration which, incidentally is moving right along very nicely so far. I refinished the baffle before extracting the broken peg . I now run the risk of marring the surface when I do get around to extracting it, but that wont happen before I source a replacement.
    The Ebay pegs sure look good but a single one will set me back more than $26 by the time it gets here so I`m trying to source a used one elsewhere if at all possible.
    There's a guy in Canada selling a used single right now
    He wants too much for it, but it's still better than $26

  13. #13
    Senior Member
    Join Date
    Apr 2016
    Location
    U.S.A.
    Posts
    302
    Quote Originally Posted by Mike F View Post
    Good tips Joseph Smith. I`m afraid I got a little ahead of myself with this restoration which, incidentally is moving right along very nicely so far. I refinished the baffle before extracting the broken peg . I now run the risk of marring the surface when I do get around to extracting it, but that wont happen before I source a replacement.
    The Ebay pegs sure look good but a single one will set me back more than $26 by the time it gets here so I`m trying to source a used one elsewhere if at all possible.
    PM me your mailing address, I will try and find you a couple of pegs, no promises but I will try
    Joe

  14. #14
    Senior Member
    Join Date
    Aug 2003
    Location
    La Habra, California USA
    Posts
    1,546
    While I don't disagree with all of the other methods mentioned here, and most are ingenious, the price of the Grabits is fairly small, and you can buy them individually if needed. Also, the use of the Grabit is quite quick, drill a pilot with one side of the tool, turn the tool over, and then reverse drill till it bites, and then the plug pulls out. I pulled 8 broken plugs in a pair of L300's in less than 5 minutes.

    Besides that, the first time you run into a stripped headed fastener (and a few JBL screws and bolts have done that to me) you'll be happy to have that tool in your box. I'm as much of a DIY guy and improviser as the next guy, but I learned a long time ago that the right tool for the right job pays dividends in time and frustration.

    Now keeping tools organized so that they are findable and at hand, that is still a work in progress.
    When faced with another JBL find, Good mech986 says , JBL Fan mech986 says
  15. #15
    Senior Member Mike F's Avatar
    Join Date
    Feb 2011
    Location
    Montreal, Canada
    Posts
    279
    After some debate, I decided that reproducing the original grilles was beyond my ability and designed a more realistic one-piece .75" MDF frame, nothing fancy but solid and functional.
    I still had some electric blue fabric left over from the 4311 restoration but decided against using it for this project, the sub is already big enough and doesn't need any additional attention which brought me to a local fabric outlet where I found some really nice navy blue material. A little stretchy in both directions, it doesn't have the weave pattern nor the density of what my previous 4425s had but the color is beautiful, I`m really looking forward to dressing the new frame.

    Name:  Grille Frame Front.jpg
Views: 575
Size:  79.5 KBName:  Grille Frame Back.jpg
Views: 638
Size:  85.3 KB

Thread Information

Users Browsing this Thread

There are currently 1 users browsing this thread. (0 members and 1 guests)

Posting Permissions

  • You may not post new threads
  • You may not post replies
  • You may not post attachments
  • You may not edit your posts
  •