Page 1 of 4 123 ... LastLast
Results 1 to 15 of 51

Thread: Refurbishing a pair of 2440

  1. #1
    Senior Member
    Join Date
    Aug 2010
    Location
    Jättendal (Giant Valley), Sweden
    Posts
    763

    Refurbishing a pair of 2440

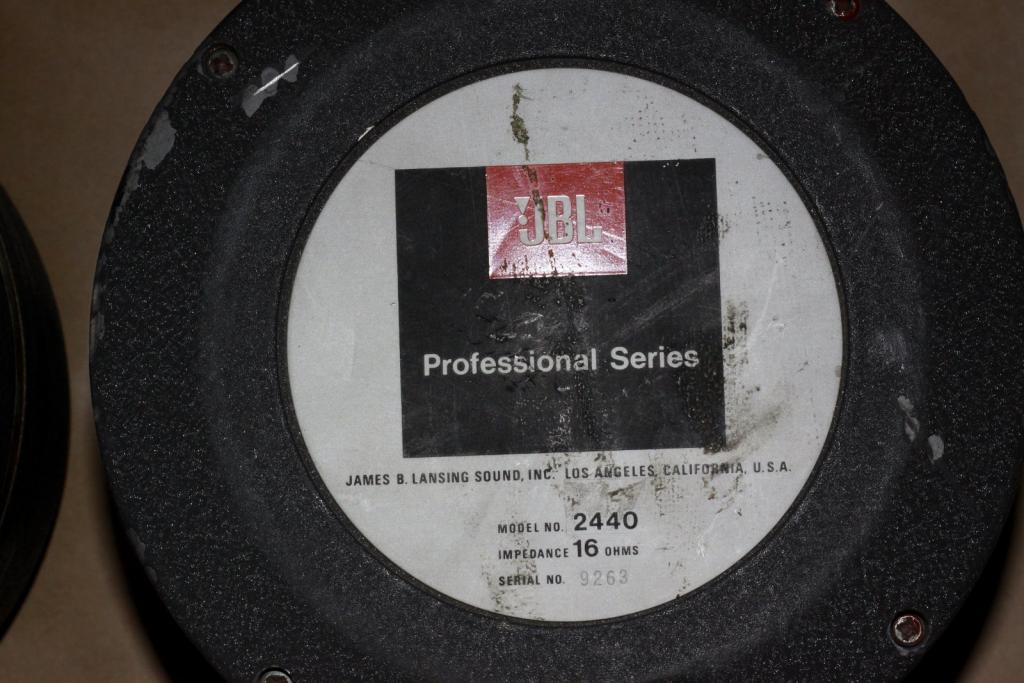
    I recently bought a pair of worn 2440 which I intend to refurbish. This is the first time i do this, so some advice will be appreciated.

    Name:  _MG_1752.jpg
Views: 3921
Size:  74.7 KBName:  _MG_1743.jpg
Views: 3785
Size:  62.3 KBName:  _MG_1749.jpg
Views: 3781
Size:  53.3 KBName:  _MG_1747.jpg
Views: 3679
Size:  45.0 KBName:  _MG_1751.jpg
Views: 3837
Size:  94.7 KB

  2. #2
    Senior Member
    Join Date
    Aug 2010
    Location
    Jättendal (Giant Valley), Sweden
    Posts
    763

    Some more pictures

    I believe the diaphragm is ok, this is a 2441 dia right?

    Name:  _MG_1764.jpg
Views: 3571
Size:  50.8 KBName:  _MG_1754.jpg
Views: 3905
Size:  83.7 KBName:  _MG_1766.jpg
Views: 3530
Size:  60.7 KBName:  _MG_1758.jpg
Views: 3515
Size:  84.0 KBName:  _MG_1753.jpg
Views: 3596
Size:  54.2 KB

  3. #3
    Senior Member
    Join Date
    Aug 2010
    Location
    Jättendal (Giant Valley), Sweden
    Posts
    763
    First thing to do is to remove the diaphragm. For this I need a titanium (non magnetic) screwdriver.

    Next thing is to have the drivers demagnitized. Then I can disassemble them. Before buying any spare parts I will check that the magnets are not broken.

  4. #4
    Senior Member HCSGuy's Avatar
    Join Date
    Jan 2009
    Location
    Bend, OR
    Posts
    752
    They do look like 2441 diaphragms - definitely not 2240's, which have the half-roll surround. Before you go any farther, do you have a remedy for the cracked throats? I have no experience with these drivers, but I thought a cracked throat meant game over, driver dead. I'm sure the Pro guys here can chime in, but I don't think even the factory would touch these. Hope I'm wrong

  5. #5
    Administrator Robh3606's Avatar
    Join Date
    Apr 2003
    Location
    Rocinante
    Posts
    8,200
    but I thought a cracked throat meant game over, driver dead. I'm sure the Pro guys here can chime in, but I don't think even the factory would touch these. Hope I'm wrong
    If you have a shop that can demag them, get the throats from JBL and remag you are back in business. JBL used to fix them. Now?? Do they have throats for them??

    Rob
    "I could be arguing in my spare time"

  6. #6
    Senior Member richluvsound's Avatar
    Join Date
    Dec 2006
    Location
    london england
    Posts
    2,060
    More10

    I'm pretty sure a good machinist could make new throats if the dimensions are around ... I can't see
    as a really expensive thing to do .... If your stuck PM Guido for the name of that company in Berlin that does all this sort of thing ....

    Rich

    PS stay out of the bar and save for the Be

  7. #7
    Senior Member
    Join Date
    Aug 2010
    Location
    Jättendal (Giant Valley), Sweden
    Posts
    763
    Well, if I can´t get new throats from JBL, a friend of mine can shurely make them. With or without factory dimensions. He has got a CNC lathe.

  8. #8
    Senior Member
    Join Date
    Aug 2010
    Location
    Jättendal (Giant Valley), Sweden
    Posts
    763
    Quote Originally Posted by richluvsound View Post
    More10
    PS stay out of the bar and save for the Be
    Going there tonight . Hoping to have a Real Ale or two .

  9. #9
    Senior Member jerry_rig's Avatar
    Join Date
    Dec 2008
    Location
    FL
    Posts
    173
    I had a pair of 2441s shipped to me and both throats were cracked. But they were made of plastic. Not sure is that would be easier or tougher to fabricate than metal throats. But you have the option to make them from just about anything.

  10. #10
    pocketchange
    Guest

    My .02 on cracked throats and rebuilding CD's.

    Non-magnetic tools = VERY positive.
    Having a cracked throat is not the end of the world and having them demagnetized isn't necessary either.
    I've been told that having a cracked throat is a more typical rule of thumb but it's very nice if you can locate a un-cracked pair.
    I cut a piece of UL rated aluminum foil (HVAC) tape (the thick stuff) and lined my cracked throat with it after cleaning out the broke plastic fragment pieces.
    As for having them re-magnetictized, Great Plains will be happy to help (but most likely it's a wasted effort).
    I did make some changes to the diaphragm cap after the typical clean-up and paint. I located some 1/2" wool mating, cut and glued into place it does a great job of whatever that foam material was supposed to accomplish.
    After it was all said and done I ended up using a Radian Diaphragm instead of the OEM JBL's in a three way KHorn
    crossed over a little higher than typical to unload the 2404H's and I have no complaints with the results.

    And please note; I'm not a pro CD repair expert.
    And my 2482's sound just fine. Thank You.
    But I did have some nice long telephone conversations with several people that were.

  11. #11
    Senior Member
    Join Date
    Aug 2010
    Location
    Jättendal (Giant Valley), Sweden
    Posts
    763
    The drivers are almost done now, thanks to my friend Peter who owns the lathe. Some pictures:

    Name:  image015.jpg
Views: 3368
Size:  136.2 KB
    Name:  image014.jpg
Views: 3271
Size:  71.7 KB
    Name:  image013.jpg
Views: 3339
Size:  89.8 KB
    Using a large lathe to center the pole plate.

    Name:  image016.jpg
Views: 3315
Size:  81.5 KB
    Outside was already done when I joined.

    Name:  image019.jpg
Views: 3258
Size:  81.5 KB
    Drilling the inside

  12. #12
    Senior Member
    Join Date
    Aug 2010
    Location
    Jättendal (Giant Valley), Sweden
    Posts
    763
    Name:  image023.jpg
Views: 3288
Size:  116.0 KB
    Peter working at the lathe

    Name:  image022.jpg
Views: 3431
Size:  103.6 KB
    Mach3 CNC application

    Name:  image017.jpg
Views: 3408
Size:  66.7 KBName:  image024.jpg
Views: 3213
Size:  75.5 KBName:  image018.jpg
Views: 3249
Size:  67.2 KB
    Inside being machined

  13. #13
    Senior Member
    Join Date
    Aug 2010
    Location
    Jättendal (Giant Valley), Sweden
    Posts
    763
    Name:  image025.jpg
Views: 3215
Size:  55.4 KB
    Polishing the inside.

    Name:  image020.jpg
Views: 3663
Size:  82.2 KBName:  image021.jpg
Views: 3225
Size:  69.6 KB
    Throat finished.

    Name:  image028.jpg
Views: 3207
Size:  107.9 KBName:  image029.jpg
Views: 3247
Size:  102.1 KB
    No need for small tolerances :-)

  14. #14
    Senior Member
    Join Date
    Aug 2010
    Location
    Jättendal (Giant Valley), Sweden
    Posts
    763
    Name:  image001.jpg
Views: 3500
Size:  88.8 KB
    All parts of a driver (except back chamber)

  15. #15
    Senior Member
    Join Date
    Aug 2010
    Location
    Jättendal (Giant Valley), Sweden
    Posts
    763
    Details of each piece
    Name:  image002.jpg
Views: 3043
Size:  88.5 KBName:  image006.jpg
Views: 3285
Size:  79.4 KBName:  image004.jpg
Views: 3186
Size:  70.4 KBName:  image005.jpg
Views: 3185
Size:  60.5 KBName:  image003.jpg
Views: 3308
Size:  85.0 KB

Thread Information

Users Browsing this Thread

There are currently 1 users browsing this thread. (0 members and 1 guests)

Similar Threads

  1. Refurbishing Drivers
    By JBLOG in forum Lansing Product Technical Help
    Replies: 3
    Last Post: 08-21-2007, 08:17 AM
  2. Refurbishing 4333a
    By ngccglp in forum Lansing Product Technical Help
    Replies: 60
    Last Post: 04-21-2004, 05:33 AM
  3. L112 Refurbishing
    By AMACNEE in forum Lansing Product Technical Help
    Replies: 5
    Last Post: 03-04-2004, 04:22 PM

Tags for this Thread

Posting Permissions

  • You may not post new threads
  • You may not post replies
  • You may not post attachments
  • You may not edit your posts
  •