Page 4 of 4 FirstFirst ... 234
Results 46 to 58 of 58

Thread: Ok now I'M lansing heritage-worthy... still can't believe it

  1. #46
    Senior Seņor boputnam's Avatar
    Join Date
    Apr 2003
    Location
    northern california
    Posts
    6,142
    Quote Originally Posted by brad347 View Post
    Think I might go to the drugstore to pick up a syringe, as it might be nice to carefully put a little bead of glue all the way around the gap between the roll and the cone for good measure. Rick Cobb's instructions recommended that as a final step.
    I tried this once, but the result was no better (for me) than just using a damp fine art paint brush and smoothing-out the minor excess that comes from beneath the surround.

    Quote Originally Posted by brad347 View Post
    Eschewed the syringe, and instead opened the second bottle from Rick's kit to where the opening was only very small-- I punctured the tip with the smallest jeweler's screwdriver I had.

    This allowed me a great deal of control, and I got nice looking beads around both surrounds to seal everything up real good.
    You learning all the experienced tricks!

    Quote Originally Posted by brad347 View Post
    So far, looking good!
    I'll say!

    This is a great docuthread. I'm considering destroy this thread and inserting the relevant posts into the existing step-by-step, with your permission of course, and only if it makes sense (when I re-review that thread).

  2. #47
    Senior Member brad347's Avatar
    Join Date
    Jun 2008
    Location
    Brooklyn, NY
    Posts
    202
    absolutely. Whatever you want to do is fine by me. I'd be happy if my posts were useful to someone.

  3. #48
    Senior Member brad347's Avatar
    Join Date
    Jun 2008
    Location
    Brooklyn, NY
    Posts
    202
    The first driver has about 3 hours of dry time on it, and the other is not far behind.

    30 Hz tone is still going, all is still well. I just might be home free (knock wood).

    The instructions say 3-4 hours to dry. I think it might be time for gaskets soon.

  4. #49
    Senior Member brad347's Avatar
    Join Date
    Jun 2008
    Location
    Brooklyn, NY
    Posts
    202
    OK, 5 hours drying on one driver, and 4.5 on the other-- I took them off the 30 Hz.

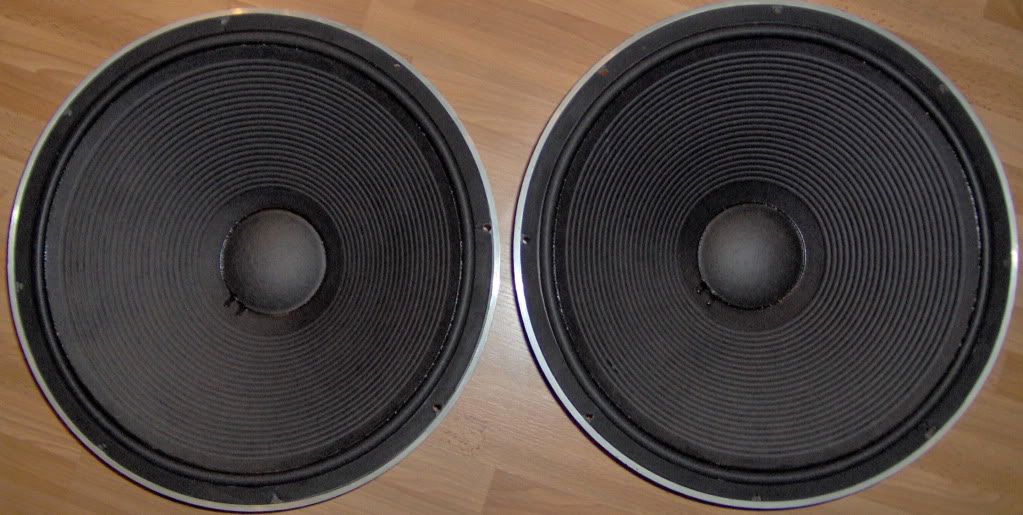
    I'm calling 'em DONE.

    Gaskets installed.


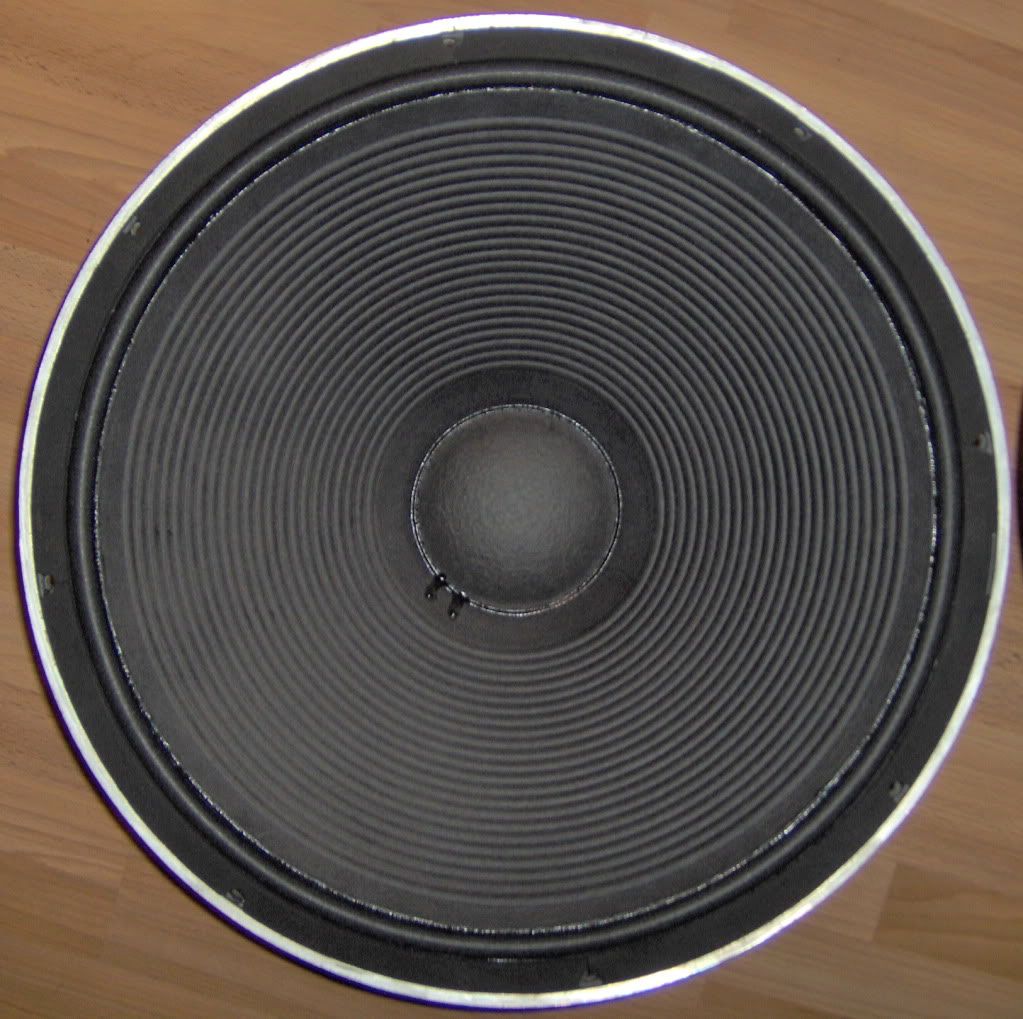
    I am very pleased with how they came out. It is NOT hard-- it just requires a bit of patience and a willingness to take the time to do the job right. This is my first ever pair and I feel they came out, appearance-wise, as well or better than the ones I've had professionally done in the past.

    Some things I learned throughout the course that might help someone--

    • Using a 1.5v battery to raise the cone helps a lot, both in cleaning the old surround material off and gluing the new one on.
    • Isopropyl rubbing alcohol dissolves the old surround material. I did not use MEK-- I actually used rubbing alcohol and a bunch of Q-tips. It seemed to sort of dissolve the old surround material, and it wiped right off on a Q-tip. Also worked on the gaskets-- on the gaskets a thin strip of glue was left behind, but it did not seem to hinder adhesion with the new glue at all. I did not see any glue left on the back of the cone after cleaning the old surround off, so... who knows? Advantages of alcohol is that it is VERY quick-drying, so it's pretty safe to use on the cone itself if you're careful (pour a few drops on a sheet of cardboard and watch what happens-- it vaporizes out of the cardboard near-instantaneously). Also, it's not as toxic as some other chemicals-- but I'm sure MEK works great, too. I just didn't have any on hand!
    • The glue left on the frame was easy enough to just rub off in my case. Took some patience but no toxic solvents necessary-- I could peel it off with my thumb by rubbing like an eraser, but I eventually folded a piece of paper several times and used the paper to rub it off. Took a little elbow grease but it didn't take much time at all.
    • My own personal "MVP" tool in this whole thing had to be the LED penlight. If you can find one of these, it gets down into tight spaces and you can REALLY inspect your work and see what is going on.


    Hope that helps someone.

    Thanks again for the encouragement to try it myself. I hope to never pay for a re-surround again. As someone mentioned on another thread, no matter how experienced someone may be, most of the time they're only doing it for the money. I took extra care because I knew I wanted these to come out extra nice. So in spite of my inexperience, I just might have done as good or better a job as a hired gun would've.

  5. #50
    Moderator hjames's Avatar
    Join Date
    Nov 2005
    Location
    NoVA - DC 'burbs
    Posts
    8,548
    Congratulations - Looks like very nice work!
    You are gonna be so happy when you get everything back together and have a chance to enjoy that system!

    Kudos to you, making the best of a sensational deal!
    2ch: WiiM Pro; Topping E30 II DAC; Oppo, Acurus RL-11, Acurus A200, JBL Dynamics Project - Offline: L212-TwinStack, VonSchweikert VR-4
    7: TIVO, Oppo BDP103D, B&K, 2pr UREI 809A, TF600, JBL B460

  6. #51
    Senior Member brad347's Avatar
    Join Date
    Jun 2008
    Location
    Brooklyn, NY
    Posts
    202
    They've now cured overnight.

    Installed drivers (180 degrees from original... hey, why not) and fired it up. They work great!

    All drivers work fine. 2122H pair will be next up on the block for re-surrounding-- however the surround on both, despite being a little dusty, still looks perfect. I realize that due to their age a re-surround is still in order very soon as a matter of course.

    I ordered a pair of the reproduction 2308 lenses from Kenrick Sound in Tokyo based on the recommendation of several people here and due to the fact that their maker is actually a member here and stopped by the forum when questions arose about his product.

    I'll keep my eyes peeled for an original pair should I determine I'd like to have them, but I'm probably just going to enjoy the repros for the forseeable future, if they're satisfactory (no reason to believe they will not be).

    It will take a week or two for them to wing their way over here from Tokyo, and then the fun with these speakers can really begin.

  7. #52
    Obsolete
    Join Date
    Apr 2003
    Location
    NLA
    Posts
    12,193
    Quote Originally Posted by brad347 View Post
    It will take a week or two for them to wing their way over here from Tokyo, and then the fun with these speakers can really begin.
    They're pretty damn fun.

    Nice job on the refoams.

  8. #53
    Senior Member jcrobso's Avatar
    Join Date
    Oct 2008
    Location
    Chicago
    Posts
    1,099

    Thumbs up Nice job!

    If alcohol works that is good, it's much safer to use!
    Alcohol will burn, MEK will explode and the fumes can be toxic!

  9. #54
    Senior Member brad347's Avatar
    Join Date
    Jun 2008
    Location
    Brooklyn, NY
    Posts
    202
    I used 99.9% pure isopropyl alcohol that I bought at my local Mom n' Pop electronics shop. Not sure how well the drugstore 70% kind works-- but the 99.9% pure anhydrous stuff ate that old surround right up. Have lots of Q-tips on hand--it liquefies the old surround into a black goo that's easy enough to remove with Q-tips. I worked on top of disposable cardboard to protect the working surface from getting sticky stuff on it.

    The 99.953% pure anhydrous alcohol I used literally vaporizes almost instantly. Great for not soaking/saturating the cone.

  10. #55
    JBL 4645
    Guest
    Wicked they look wicked now play them and make it loud!

  11. #56
    Senior Member herki the cat's Avatar
    Join Date
    Jun 2009
    Location
    NA
    Posts
    245

    considering destroying this thread, inserting the relevant posts into the existing...

    Quote Originally Posted by boputnam View Post
    I tried this once, but the result was no better (for me) than just using a damp fine art paint brush and smoothing-out the minor excess that comes from beneath the surround.

    You learning all the experienced tricks!

    I'll say!

    This is a great docuthread. I'm considering "destroy this thread" and inserting the relevant posts into the existing step-by-step, with your permission of course, and only if it makes sense (when I re-review that thread).
    herki
    Member-brad347's experience with Rick's kit & assistance, & the 99.9% pure isopropyl alcohol, are very all important to many of us planning identical driver repairs.

    Regarding the plan: " I'm considering destroy this thread" and inserting the relevant posts into the existing step-by-step.....

    I suggest not destroying any part of brad347's valuable experience....prefer not to stumble through the the learning experience he has carefully described avec soin. It would be most valuable to simply add all his posts in tact to the existing step-by-step thread.

    For what it's worth... Isopropyl rubbing alcohol is 70% alcohol with the other 30% consisting of cosmetic oils, etc, & water. The 90% Isopropyl alcohol is 90% pure alcohol plus 10 % pure water. As you know, it is used extensively to prepare the human skin area for syringe injections as well as cleaning minor skin injuries. MEK vapors destroy foam almost instantly, & it is used as a solvent in cellulose based cements. Acetone is a less expensive, more agressive solvent similar to MEK. Both are just as flammmable as gasoline & require extreme care.
    Last edited by herki the cat; 05-14-2010 at 08:19 AM. Reason: cleanup the text

  12. #57
    Senior Member brad347's Avatar
    Join Date
    Jun 2008
    Location
    Brooklyn, NY
    Posts
    202
    Got my replacement aftermarket lenses today from Kenrick Sound. They're very nice-- all plates on both lenses were straight and true with no waviness or curl. I can't imagine how they could be any nicer. They get an A+ from me.

    It's also interesting to hear the system as it was designed, with the lenses in place. Needless to say it has taken these speakers to where they belong. The horn was a bit directional without the lenses--dispersion is greatly improved with them in place, and the whole system just tends to "work" better with them in place-- can't really explain it beyond that. Maybe it could be time-alignment related?

    Anyway, I can't wait until I can afford to spend some quality time (and money) getting them properly amped in a bi-amp setup.

    Thanks again for everyone's help.

  13. #58
    Senior Seņor boputnam's Avatar
    Join Date
    Apr 2003
    Location
    northern california
    Posts
    6,142
    Quote Originally Posted by herki the cat View Post
    I suggest not destroying any part of brad347's valuable experience....prefer not to stumble through the the learning experience he has carefully described avec soin. It would be most valuable to simply add all his posts in tact to the existing step-by-step thread.
    That is the plan, but there is a bunch of riff-raff in there we might be able to excise and thereby focus the content. As I said, I need to look carefully at that and then review the potential issues with aggregating it to the other. I hope it works - this is a good thread.

Thread Information

Users Browsing this Thread

There are currently 1 users browsing this thread. (0 members and 1 guests)

Similar Threads

  1. Lansing Heritage Weekend
    By Titanium Dome in forum General Audio Discussion
    Replies: 95
    Last Post: 01-16-2006, 04:04 PM
  2. Lansing Heritage is Moving
    By Don McRitchie in forum Forum Feedback
    Replies: 25
    Last Post: 12-17-2003, 09:38 PM
  3. Thanks Lansing Heritage
    By Anton in forum Lansing Product General Information
    Replies: 0
    Last Post: 05-02-2003, 12:27 AM

Posting Permissions

  • You may not post new threads
  • You may not post replies
  • You may not post attachments
  • You may not edit your posts
  •